Friday, May 15, 2020


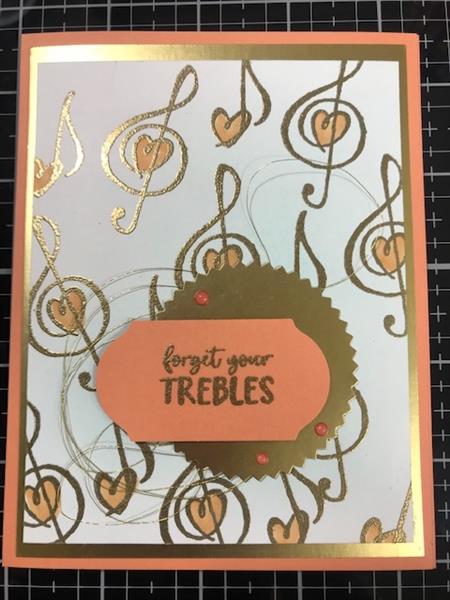
Music From the Heart. -  Card #1

I love this stamp set!  If you are musically inclined or know someone who is.....this is the perfect stamp set for you.  Here's how I made this card:
  1. Use the standard A2 card base which a 8 1/2" x 11" sheet of cardstock cut in half (on the 11" side, cut at 5 1/2"...this will give you 2 card bases out of sheet of paper). I used Grapefruit Grove as my card base.
  2. Cut a piece of Gold Foil at 5 1/4" x 4".  Now, use your Starburst punch and punch out of the center of this foil 
  3. Your next layer is Whisper White cut at 5" x 3 3/4".  Take this piece and stamp in VersaMark Ink and then use Gold Embossing Powder - heat set it.  Also take a scrap piece of Grapefruit Grove and stamp your sentiment in VersaMark use Gold Embossing Powder as well
  4. Color in the hearts with Light Pumpkin Pie Stampin' Blends
  5. Glue all your layers together
  6. I adhered some Gold Metallic Thread, then popped up the Gold Starburst Circle, then glued the sentiment to that
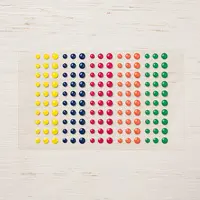
  7. Embellish as you wish (I used Happiness Blooms Enamel Dots) , finish the inside of your card, sign the back and decorate your envelope!


Two Cards using the Heart Punch Pack These cards are really easy to make and you can use any color combo you like. Hope you like them and make a lot of them to send out to put a smile on the recipients face! Here's how I made them: 

1.  I cut an 8 1/2" x11" piece of Thick Whisper White card stock in half and scored at 4 1/4" 
2.  Cut a piece of Black card stock at 4" x 5 1/4" 
3.  Cut a piece of Whisper White card stock at 3 3/4" x 5" 
4.  Use either one of the Heart Punchs to punch out all the Hearts. I used Bermuda Bay, Costal Cabana, Pear Pizzazz, Gorgeous Grape and Highland Heather. 
5.  Lay all the Hearts out on your Whisper White to arrange as you like. I just started with the center piece (Costal Cabana) to make sure it was centered on my card stock and then arranged the rest of the Hearts accordingly.....glue them down and then trim off the edges.  
6.  Glue all your layers together 
7.  Stamp your sentiment and use the Triple Banner Punch to create the flag tail on one end. Pop up your sentiment 
8.  Tie a bow out of your favorite coordinating ribbon (I used Gorgeous Grape Mini Striped Ribbon) and attach with a glue dot. 
9.  Embellish with Glitter Enamel Dots 
10. Finish the inside as desired, sign the back and decorate your envelope!


Tuesday, May 12, 2020

Quad Fold Card

 
Quad Fold Card using Timeless Tropicals DSP. (You can use ANY DSP of your choice) 

1. Daffodil Delight cardstock - cut 2 pieces at 4 x 5 1/2" AND 1 piece at 4 3/4" x 11" (Score this piece at 2 3/4", 5 1/2" & 8 1/4")
2. Whisper White cardstock - cut 4 pieces at 3 3/4' X 5 3/8" AND 4 pieces at 4 1/2" x 2 5/8" 
3. Designer Series Paper (DSP) cut 4 pieces at 3 1/2" x 5 1/8" AND 4 pieces at 2 3/8" x 4 1/4"  
4. Using the 4 3/4" x 11" - measure up from the bottom 2 1/2" and make a tic make, then CUT from that mark up to your score/fold line - on both ends. 
5. When attaching your angle pcs., first lay them out spaced like you want and put a tic mark 1/8" from the side edge and top edge and then cut that angle with your Trimmer. Do that step with both the Whisper White layer and the DSP layer.  
6. Now glue all layers together 
7. On a scrap of Whisper White - stamp your inside sentiments and cut out using the Stitched Nested Label Dies. Use the sizes you like. Also cut out (I used the DSP that matched the angle cut pieces) the next size larger Die to match. 
8. You can also do the same technique to apply to the front of your card.....I used the "In the Tropics" dies and cut out the pineapple 
9. Embellish as you wish, sign the back & decorate your envelope


Tuesday, May 5, 2020


Bonanza Buddies
How cute and sweet are these two cards!  This Bundle (Stamp Set & Dies) are going away.....so, be sure to grab them up before they're gone forever.  Also, these cards are mostly the same just changed colors and critters and minor layout change, but get crazy and make them your own.      Here's how to make 'em:


  1. Score an 8 1/2" x 11" sheet of colored cardstock (I used Terracotta Tile & Bermuda Bay) on the 8 1/2" side (at top) at 4 1/4", then turn to the 11" side and cut at 5 1/2".  This will give you 2 card bases
  2. Cut your 1st layer at 5 1/4" x 4" (I used Grapefruit Grove on the 1st Card but did not use a 1st layer on the 2nd card)
  3. Cut your Designer Series Paper (DSP) at 2 3/4" x 4" and glue to your 1st layer
  4. I used Daffodil Delight 1/4" Ruched Ribbon to cover the seam where the 2 papers come together but you could also use a 1/4" strip of colored cardstock that will coordinate. (on the Bermuda Bay card I used paper and on the Terracotta Tile I used ribbon)
  5. You can adhere this to your card base now
  6. Using the Starburst Punch (it's also going away) punch out of the Terracotta Tile cardstock
  7. Using the 2" Circle Punch, punch out Grapefruit Grove or Costal Cabana
  8. Using a piece of scrap Whisper White stamp your Lion using Grapefruid Grove and then stamp his mane in Terracotta Tile.....separately. Then die cut them both out. (On the Tucan, I just used the die and cut out using the DSP.....the die fits on one of the Tucans....yay)
  9. Die cut out on Whisper White the Tag
  10. Now glue the 2 circle punched pieces together and glue to the Tag
  11. Glue the body of the Lion to the top circle, the pop up the Mane & Tail, then glue the head to the top of the Mane
  12. Stamp your greeting to the bottom of the Tag
  13. Decorate the inside of your Card, Sigh it and decorate your envelope